LIGHTING
When it comes to filming, lighting is essential as it creates the mood and helps to tell the story.
“The purpose of light is to manipulate and articulate our perception of the environment”- Sight Sound Motion Herbert zettl
Lighting in film is responsible for capturing the correct effects in different scenes with the aid of composition. Light can draw attention to a specific point of interest and also add depth to a scene. It is an intuitive effect that influences our emotion.
This weeks lab focused on lighting in which we learnt what we needed to consider before lighting a scene. This is because in order for lighting to be used in the correct way and convey the right story, there are certain factors that are needs to be considered, these factors are:
- Script
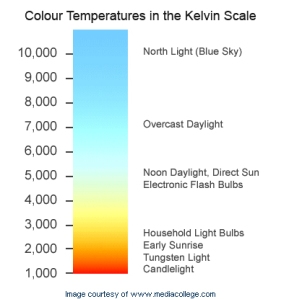
- Colour temperature
This generates a certain mood and also the importance of it no matter what time of the day it. (Measured in Kelvin Colour it is the temperature or hue of a light source and can be altered (balanced) through the use of materials such as gels) the colour temperature can be adjusted in order to create a feel or look of a scene, for example if we want the a scene or a picture to look warm, we need to decrease the kelvin colour temperature and so on.
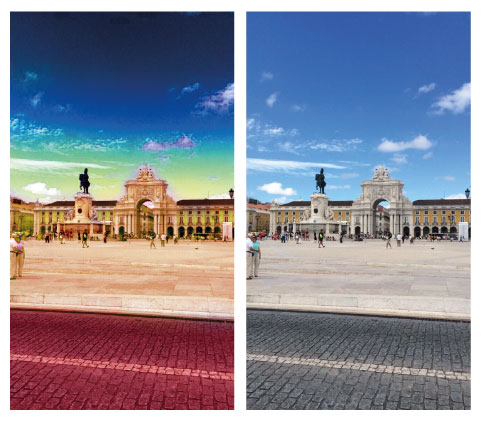
Colour temperature can be mixed for creative effects, for example the image below is one my friend and I played about with when we were trying to create a card for another friend in our flat. We found this image from Google as its one of her favourite places in Lisbon Portugal, we decided to manipulate this to give it new look by using Photoshop.
This is the image:
- Gels
Plastic sheets which are placed over lights in order to filter a light and produce a certain colour. Gel is used for colour balance, diffusion (softens light intensity) and filter (brings light intensity down, without affecting the colour temperature).
We used gels for the following reasons: Green Fix, Background Lighting (adds character to a footage) and mood lighting (adds drama to a scene)
- Reflectors
This is a large circular, oval-ish discs that are used to reflect light in a scene on an object or subject. Reflectors have different colour temperature properties, and can be strong or soft.
- Types of lights
The types of lights used are important and also the position, as use of wrong light can lead to a low quality production. There are different types of lights, each with different intensity. Such lights include
- HMI Lights (Hydrargyrum medium-arc iodide, used to light up large areas)
- Dedo Lights
- Redhead (Tungsten)
- LED’s
- Fluorescent (Be careful of this, as this can alter the colour of a scene)
______________________________________________
From reading the Sight Sound and Motion book, i learnt the following
There are two major aesthetic lighting techniques for establishing mood and atmosphere, these are:
-
High Key
It is a style of lighting used in film or photography, that aims to reduce the lighting ratio in a scene. High key light means the scene has a large, bright source of light. It is the main source of light as it is the light that revels the shape of an object or event
“It reflects the normalcy and or upbeat feeling “-(sight sound and motion)
-
Low Key
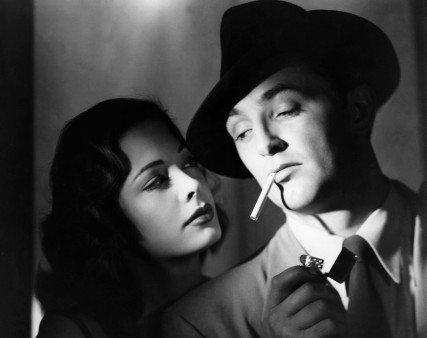
Low Key lighting is highly selective. This lighting leaves the background dark, as it consists of fewer lights used compared to high key lighting. Low key lighting is commonly used in Film Noir in order to capture that mystery feel.
______________________________________________
Three point lighting
- Key light
The main source of light, which reveals shape, object or event.
- Fill Light
This light is fall off light in other terms it is the light that bounces of a surface and onto the subject.
-
Back light
This light adds depth to the subject being filmed and can at times provide an outline of the object if done correctly from behind. This light aims to stop the main object or subject from blending into the background compared to film Noir movie which does the opposite.

______________________________________________
TASK
WORKSHOP FILMING
The following images and sketches below are work that was carried out during the workshop in which we were assigned to make a short video, a minimum of 10 seconds.
OBJECTIVE
The main objective was to create a minimum of 10 second video in groups of 3-4. The video produce should aim to convey a feeling with the use of light, without the requirement of any dialogue. This required us to experiment with lighting and also use the knowledge learnt from the level 1 in order to achieve the assigned task.
What the video was trying to convey
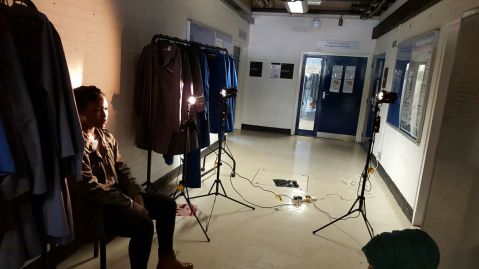
The video aimed to convey a tense atmosphere and required a lot of experimenting and moving around in order to capture the right feel. This was a struggle, due to the time of the day it was filmed which meant there was a fair amount of natural light and therefore we couldn’t cast the feel we were aiming for properly and produce an effective shadow. However we overcame this by relocating from our original location; which was the hall of way in tower C to the green screen room where the final footage was captured. The green screen did not produce any unwanted reflections, however this meant we needed to capture intensity of light especially as the actress (Me) was of a darker skin tone.
Planning
Before filming we gathered around and discussed the following
- The mood we wanted to go for
- Who should be in the video
- What location is going to be filmed at
- The narrative structure of the video
- How many lights needed/what kind of light needed (talk about dedo lights and we used it)
By planning as numbered above before filming, it gave us a clear indication of how the video should turn out and also gave us concise steps to follow to achieve our finish product. In planning our video, we had to consider a lot of factors in terms of lighting and where it should be positioned and the intensity of the lights among others.
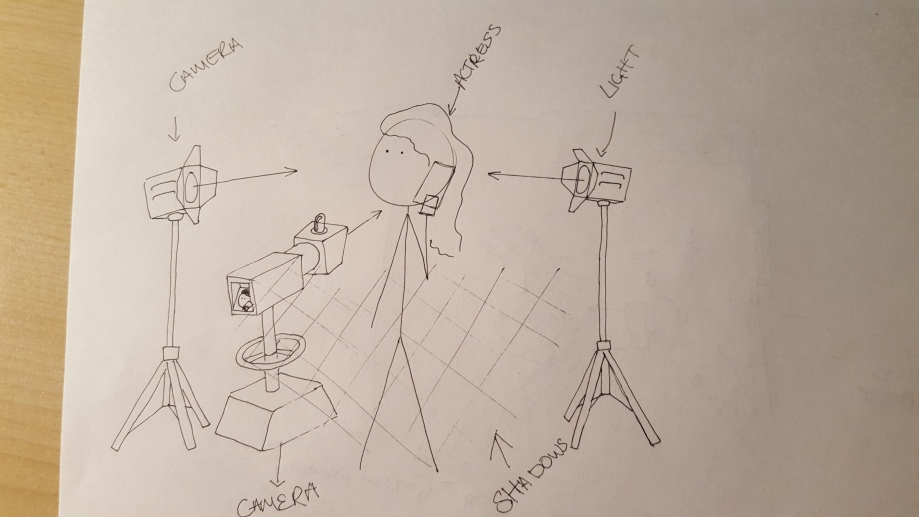
The drawing below shows a situation in which planning was important this being the positioning of the lights in our scene.
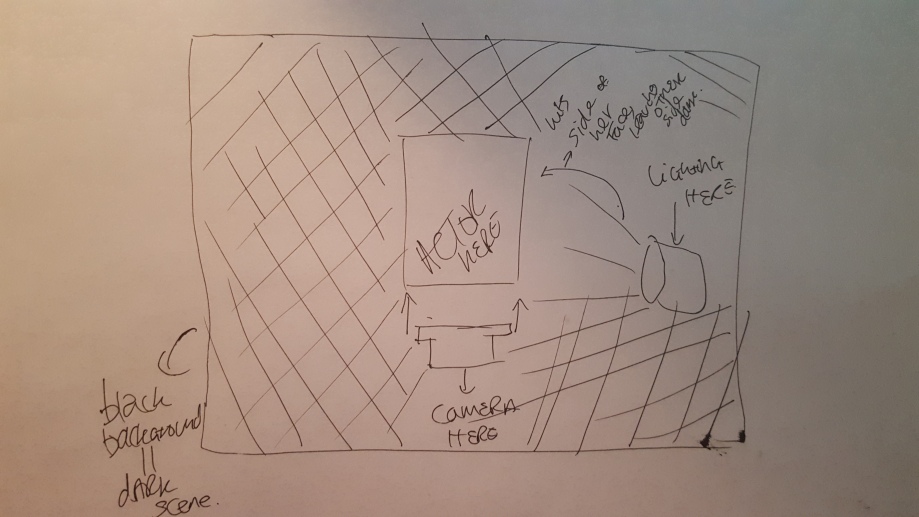
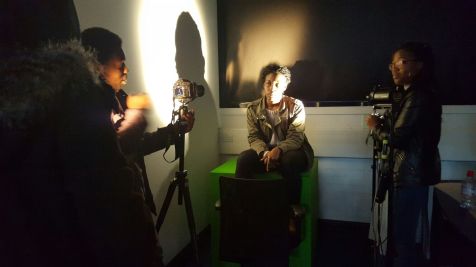
These are the images from the production sight. As you can spot we tried using the three point lighting technique, however we moved to low key lighting, as this is type of lighting is selective and as we wanted mostly the actresses face to show low key light was appropriate.
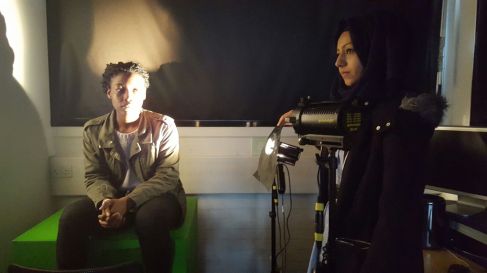
This is the final product
Positive aspects
- Lighting was good and used correctly in terms of the intensity which was appropriate for the actress due to her complexion.
- Created the mood we were aiming to go for especially when edited with soundtracks, even though it still works without sound effects.
Negative aspects
- Couldn’t see the actress eyes properly especially on the left side of her face, it would have been better if her eyes were lit up so its more intense especially as she turns to face the camera slowly.
Improvement
If this video was to be developed further, we could keep on experimenting with the light in and the intensity of it in order to capture that intense mood we were going for by adding possible red gels over the dedo light which cast a reddish glow and create more a dark, intense atmosphere.
In addition, we need to communicate more. Even though we communicated well as the video shows a reasonable understanding of lighting I felt that words were lost in translation, causing us to start filming late.
_____________________________________________________
WEEKLY READING
Sight Sound and Motion [Herbert Zettl]
Chapter 3
Lighting
This chapter explains how lighting is used to control shadow and the intensity of it. It goes into details as it identify the different functions of lighting and also the techniques and when is manipulated causes us to subconsciously react to the given situation. For example when a scene is dimly lit the audience experiences anxiousness. Which could premeditate a dramatic part of the scene.

Apart from key light, back light and fill light. The books goes into details about different type of lights used such as fill light, side light, kicker light and the background light. However the standard lighting explained in the book is key light, back light and fill light.
There are two main lighting techniques:
- Chiaroscuro
Means lighting used for falloff and for light/dark contrast, this type of lighting aims to clarify and also intensify three dimensional objects and also the space around them in order to give it an expressive quality.
- Flat
The opposite of chiaroscuro lighting , as light appears to be coming from all directions. This lighting shadows are usually very unnoticeable as it has a very slow falloff. Its a type of light that is used when where visibility is more important than aesthetic functions.
There are however more techniques for lighting, these include:
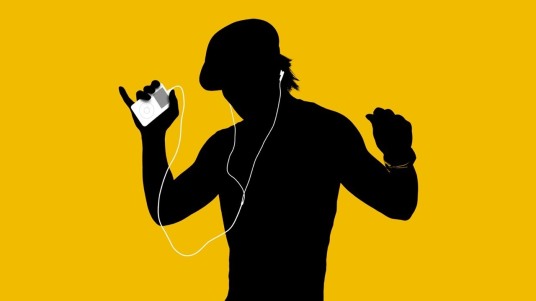
- Silhouette
This type of lighting is when the background is lit and not the figure. It has the characteristics of both previous light (chiaroscuro and flat lighting); Chiaroscuro lighting part because it has an extreme light/dark contrast, Flat lighting part because it shows/emphasises the contour rather than the volume.
For example silhouette lighting can be seen used in one of Apple advertisement for the iPod
- Media-Enhanced/Media Generated
This is the manipulation of lighting by the medium itself. These manipulations are one that forms a weird, yet appealing images such as posterisation, spotlight effects and so on…
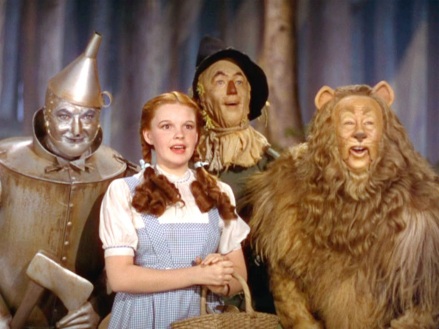
I found this interesting and wanted to try and manipulate the lighting of an image using Photoshop in order to create a posterization as i liked the way it looks like when seeing examples on Google. I used Photoshop as its one the most commonly used software when it comes photo editing.
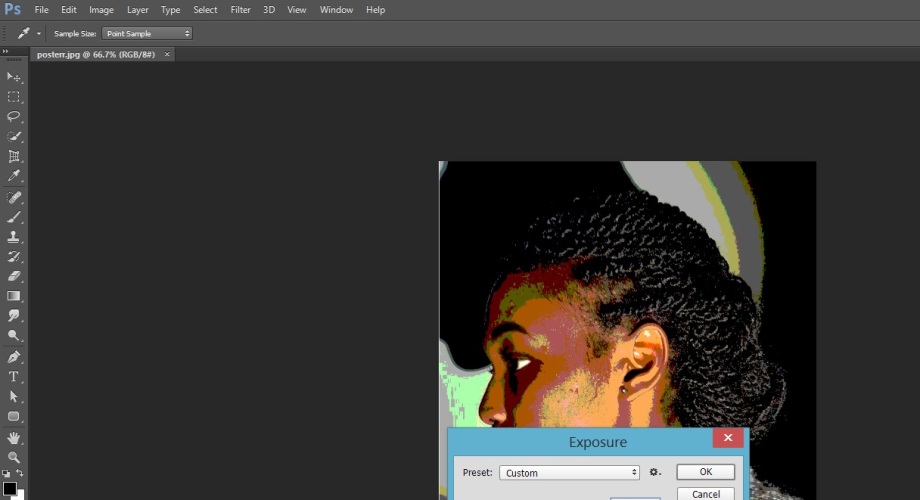
This is what the picture looks like

- Single and Multi-camera
Single camera lighting is when a shot is set up and lit separately, whilst multi-camera is lighting that overlaps action areas, it decrease the aesthetics of the shot considerably.
Other reading source include the following:
- https://www.cinema5d.com/common-types-of-film-lights/
- http://filmmakeriq.com/lessons/introduction-to-color-temperature/
- https://filmcameracourse.wordpress.com/2012/03/02/lighting-for-film-tv-part-1-the-basics/
From this reading lead me to explore what kind of light would be suitable for my screenplay, if it was potentially created and as my screenplay will consist with a lots of shadows, I decided to do a little light reading and research shadows and lighting in order to find what lights are good to achieve effective lighting
- http://www.videomaker.com/article/c13/12994-casting-shadows
- http://www.onstagelighting.co.uk/lighting-design/shadows/
- http://www.onstagelighting.co.uk/lighting-design/shadows/
This link goes into depth about video making, shadows and lighting. I was fascinated to learn so much for example the density of a a light or darkness will is solely dependent on the amount of ambient life, in addition to this adding different lights just produces more shadows and if i wish to remove or lessen the shadows on my film i must ensure that the intensity isn’t high, nor are there necessarily lights I may not require.
From this I need to ensure I use suitable lighting technique that is best suited towards by screenplay. Here’s a sketch of my a scene where i plan to use lighting.